mandag 31. desember 2012
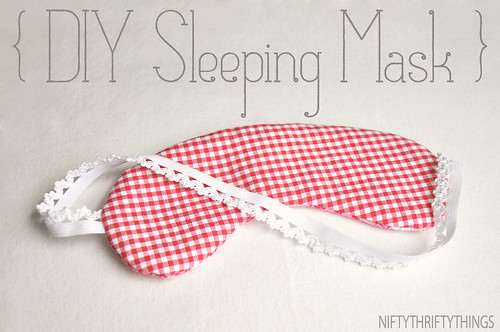
Make: Mr. Moose
Hi everyone!
Good news and bad news today (not very bad though, don’t worry  ). Good news is Phil fixed our laptop! He’s handy that boy (he has also been known to fix our washing machine, other people’s washing machines and even the odd dodgy bit of car in the past). Bad news, Phil and I are back into revision again (I know, it doesn’t feel like long since the last bout, yuck!!!). So, I’m take a study break to stop by this evening and share with you a super fun project I’ve worked on during evenings over the past few weeks.
So, without further ado, let me introduce Mr. Moose.

As with most of the projects we make, Mr. Moose has a bit of a back story to him. A few weeks ago was my birthday (I was 26. All I’m going to say is that my boy knows me too too well because between birthday festivities Phil made me an enormous Reese’s Pieces icecream cake … he’s a keeper that one!  )
)
Anywho, it turns out my brother and his lovely girl Vicky also know me and my crafty ways too well because in addition to two sets of bamboo knitting needles (which I’ve been itching to try for a while) they also got me some of the nicest, most beautifully soft undyed wool I have ever owned. It smells like a sheep. I think that says it all

It is made by Ardalanish on the Isle of Mull (which funnily enough is where I worked on one of my last knitting projects, you can read about here) and comes in three beautiful breed’s natural (i.e. undyed) shades: Bluefaced Leicester, Manx Brown and Hebridean Brown. I got two balls of Bluefaced Leicester and two balls of the Manx Brown, and more or less from the minute I opened them, I knew they were perfect for the project I’d been storing up on Ravelry for a while, a cute as anything amigurumi moose.
A very brief word on amigurumi. Amigurumi is the japanese craft of crocheting small stuffed animals or toys. The animals are usually made using single crochet stitches and worked in the round to make each of the individual body parts, which you can then stuff and sew together. The lovely thing about it is that the single crochet gives you a pretty tough stitch which ends up being almost sculptural so you can make just about anything you can think of! (I’ve even seen a whole set of star wars characters before. Amigurumi yoda = heart meltingly cute! )
Unfortunately as I bought the pattern for the moose, I can’t share it with you here, but the pattern is by Brenna Eaves, and is available here on Ravelry or if your not signed up to Ravelry you can find it here on her Etsy shop. I can’t recommend it highly enough. It costs $7, which I think is a really fair price and it was easy to follow, very detailed and rarely for a pattern I follow, I actually didn’t make any tweaks at all as I went along (not bad going huh?).

Now, I should preface this post by saying that I am not a pro crocheter. I would always call myself a knitter first and foremost (actually, thats not true, I’d call myself a quilter, but in terms of working with yarn I knit far more often than I crochet.) In fact, my crochet experience only really stretched to the odd granny square for a blanket. So I knew the moose was going to be a challenge.
Also, the pattern does say that it’s is not suitable for beginner’s. But never one to shy away from a challenge (or perhaps just a glutten for punishment!) I gave it a go anyway, and slowly slowly made progress. When I encountered a stitch I didn’t know I searched for it on youtube, watched a few tutorials and practiced it until I’d got it down and then used it in the pattern. The nice thing about crochet too, is that if you get your stitch wrong (as happened many many times!) you can just pull a stitch back and try again (which is always trickier in knitting).
So, now that the project is finished what so I think about the ‘not suitable for beginners warning?’ Well, I would say I half agree (nothing like sitting on the fence lol). If today is your first day picking up a crochet hook then probably the moose is a bit of a big first step, so not for total beginners. But, if you are just new to amigurumi but have a little bit of time to persevere and like learning as you go I think its actually a great pattern to start on.
Luckily, Mr. Moose was finished just in time for taking on a very important job. My little brother, who is now sadly not so little at all, moved out last weekend to start his first proper grown up job and live in his first proper grown up flat all by himself. So, I tasked Mr. Moose with the respectable job of being a guard moose for my brothers new flat. After all, living alone for the first time can be a bit freaky for the first few weeks, so who wouldn’t want the company of a friendly moose to keep them safe on their endeavours in the big wide world?
So, before I embarrass him anymore (he he he), lets get down to the nitty gritty of making a moose.

I used:
a size 4.5 crochet hook,
1 and 1/2, 50g ball of brown wool in the Manx brown colour of the Ardalanish wool,
1/2 a ball (also 50g) of cream wool in the Bluefaced Leicester colour of the Ardalanish wool,
a couple of strands of black wool for the eyes
4 circles of card to sit in the hooves and add a bit of support to him standing up
a tapestry / wool needle to sew everything together
stuffing
The first order of service was to crochet all of the constituent parts. This included a round oval body, a slightly bigger round oval head, a neck, 4 legs, a tail, 2 ears, and 2 antlers (which were made of one long sausage shaped tube and 2 little nubbies).

Everything was crocheted in the brown, apart from the hoof end of the legs and the antlers which were crochet in cream. I checked out a few mooses on the internet and I think a brown body and cream antlers is more ‘moosey’ and less ‘deery’.
Before finishing each shape, I stuffed it with a polyester filling (I don’t really like adding polyester to things, but the polyester filling is fire retardant which is actually kinda important for stuffed animals) then crocheted it closed ….. the pattern was very good about telling you when to stuff each body part, so you didn’t accidentally leave yourself with too little room.

Before I stuffed the legs I popped a little circle of card in the bottom of each hoof to help him stand up nice and straight on a flat surface (it’s no good having a guardmoose if he keeps falling over!)

Then all that was left to do was to sew each of the stuffed components together. I found an excellent video online, which you can find here, on how to sew together amigurumi crochet pieces invisibly. I can’t recommend it highly enough! It was great and as I was sewing my pieces together I was super thankful I had watched it first!
All that was left to do in the end was to sew on his eyes!

Here he is finished from behind …..

And right after he fell over mid photoshoot, oopsy lol.

The good news is that Mr. Moose arrived with Adam this morning, so I’m pretty sure they’ll be making friends as we speak.
We hope you all had a lovely weekend. I am enjoying another birthday treat tomorrow, as my parents have sent me on a bookbinding course for the day. I am super excited! I’ll be sure to take lots of pictures so share what I learn.

Have the nesting urges hit me yet? I’m not sure, but judging by the number of quick bread loaves piling up in my kitchen, the chances are pretty good that I am! After wrapping them all tightly with plastic wrap, and stowing them away in the freezer, I plan on gifting the loaves to friends and family who offer us help during my first month or so with the little kiddo. Now, I ask you, would you rather receive a bread loaf stuffed into a zip-lock bag? Or something delicious wrapped in a pretty, patterned package? I prefer the pretty option. And I hope my family and friends will appreciate their little gifts too!
Want to make your own mini loaf wraps? Check out the directions and printable template below.

- mini (or full sized, but you will have to make your own template) bread loaf
- variety of heavy-weight patterned paper plus coordinating card stock
- light-colored cardstock to use as a template
- scissors (regular and decorative edged)
- tiny hole punch
- twine or ribbon
- 1 1/4″ hole punch
- measuring tape
- ruler
- pencil and gel pen

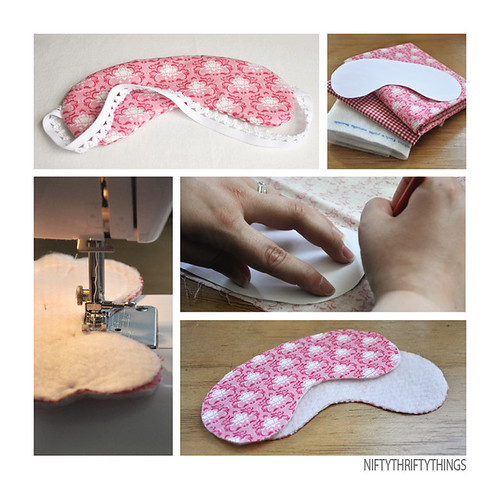
1.) Print the template onto your card stock, if you are working with a mini loaf. If you are working will a full-size loaf, measure the perimeter (just sides and bottom, not top) of the short and long sides of the loaf. Note the width on the template card stock, and then measure the height of the sides of the loaf, noting this dimension as well.
2.) Cut out your printed template, or if you are making your own, mark the perimeter onto your card stock (my mini loaf measured 6×8″), and then mark out squares in the corner, measured to the size of the height of the loaf (mine measured 1.75″). Connect the lines with your ruler and a pencil, then cut along the lines to make the template.
3.) Using a pencil, trace the template onto the back side of your patterned paper, making sure the pattern is going the direction you prefer. Then cut out the patterned paper.
4.) Trim the tops of each side with decorative edged scissors.
5.) Using the tiny hole punch, punch holes into the two corners of each edge. You will punch 8 holes total.
6.) Punch a hole into your template with the 1 1/4″ hole punch, to use as a template for writing your tag labels onto the coordinating card stock. Lay the template over your coordinating card stock, and using a black gel pen, and write your message in the middle. If your first line ends up off centered, just adjust the template. This is why you are writing the label before punching out the circle.
7.) Once your label is written, line up the back side of the hole punch with your label and punch it out, making sure you leave enough room at the top for punching a tiny hole to attach the label with twine.
8.) Bend the sides of your patterned paper wrap, insert the loaf (wrapped in plastic or wax paper first), and interlace the tiny punched holes with twine. Make sure you have enough twine left on the ends to tie a bow! Trim the twine, tie it, attach the label, and then tie it into a bow.

That’s all there is to it! I made a bunch of these little guys at once, to keep back and use in the future, because they’ll be great to give for the holidays, as party favors, or to prettify a bake sale. Easy as pie, right? Or I should say, easy as quick bread. Enjoy!

Crocheted Rose Pillow Tutorial
 |
| Pier 1's Lavender Rose Pillow, $34.95 |
Great minds truly do think alike. Except for the fact that Sharon really loves that purple color, and I really don't. I'm just not a purple-lover. Wanna make something of it? That's what I thought.
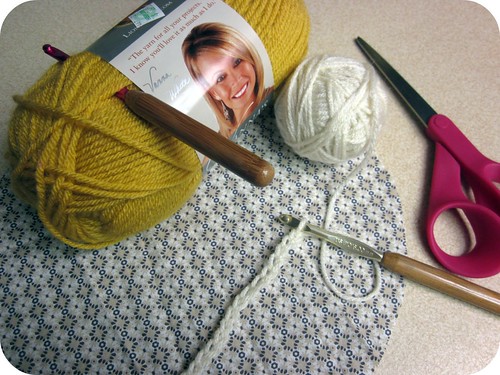
Back to the pillow--want to make one? Sure you do. Here's what you'll need:
crochet hooks that correspond to the size of your yarn
2 balls of yarn (can be the same color)
scrap fabric for making the pillow
poly-fil
a good old-fashioned needle and thread
an embellishment for the center (maybe a pretty brooch or a big button)
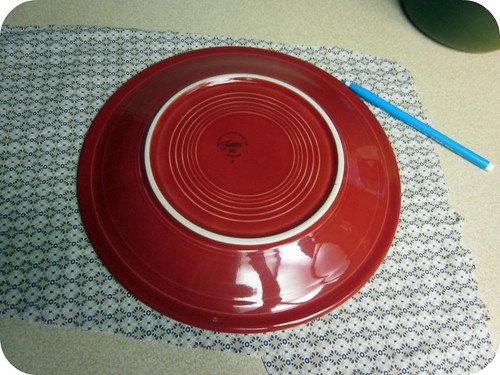
Before you start crocheting, you'll want to determine the size of your pillow. I wanted a small accent pillow, so I traced a 10" dinner plate onto scrap fabric. In hindsight, I wish I'd used plain fabric, but I was trying to be thrifty and use what I had on hand. Be sure to cut two matching pieces of fabric--a front and back for your pillow.
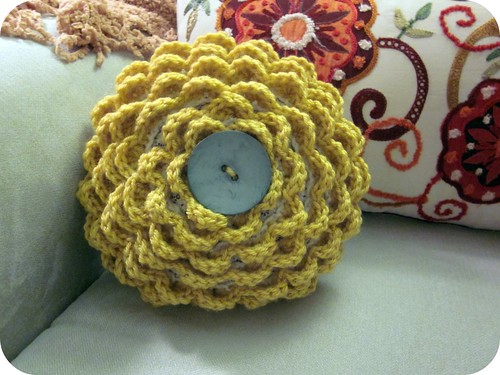
Now it's time to get crocheting. I've been crocheting for about 6 months now, so I'm by no means qualified to make patterns or use the jargon--but here goes anyhow. Please note that I used two different colors of yarn to better show how I went about creating the pattern. With the base color (white) I made a chain--I probably started with about 20 stitches. Then I began to make a shell pattern using the yellow yarn, starting at the beginning of the chain. Here's the shell pattern I used:
1 sc *skip 1 st, 5dc into next st, skip 1st, 1sc into next st; rep from * to end.
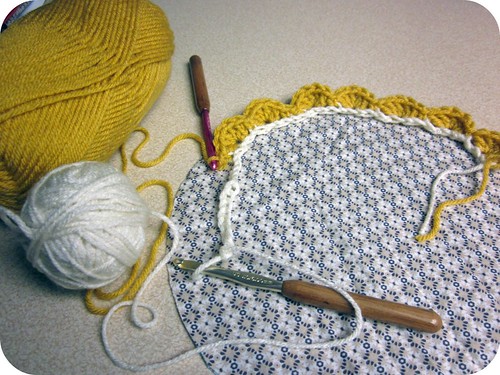
I know it sounds kind of complicated, because you are basically running three processes at once--the chaining, the shelling, and stitching it all down on to the fabric. It's really not that complicated, though. The reason I did this little by little is so that I only made enough crocheted shells for the pillow and so I didn't waste my time and resources making a string of shells 20 feet too long. Make sense? It worked out pretty well, though I wish I'd sewn the strands of shell closer to each other so that the petals would appear fuller like the original Pier 1 pillow.
Live and learn, right? With the lessons I learned, your pillows are bound to be better than mine!
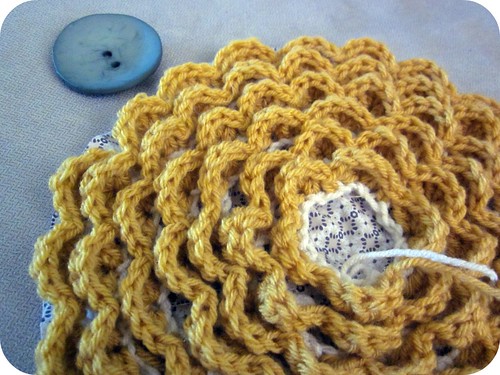
Anyway, follow the same process until you work your way into the middle of the pillow. Now it's time to add your embellishment. The Pier 1 pillow has a gorgeous rhinestone cluster in the center--this would be the perfect opportunity to use a brooch from a thrift store or from your own jewelry box. I chose a big blue button I picked up at Hobby Lobby for $2.50.
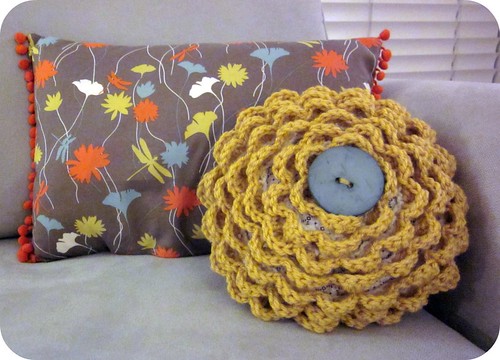
Sew or pin your embellishment in place and then finish your pillow as you normally would (taking care not to sew the petals into your seams).
Voila! A beautiful and unique accent pillow!
Yeah, Sharon and I are both a bit pillow-obsessed lately. But there are worse things to be obsessed about, right?
I don’t know about you but I am loving everything that is blooming right now! One of my favorite things to decorate with is fresh flowers. I think it brightens up a room so much!
A couple weeks ago at Michael’s I found some tiny little glass vases for .99. I thought they would be fun to set around with some smaller blooms in them. I couldn’t find just the right spot to display them though.
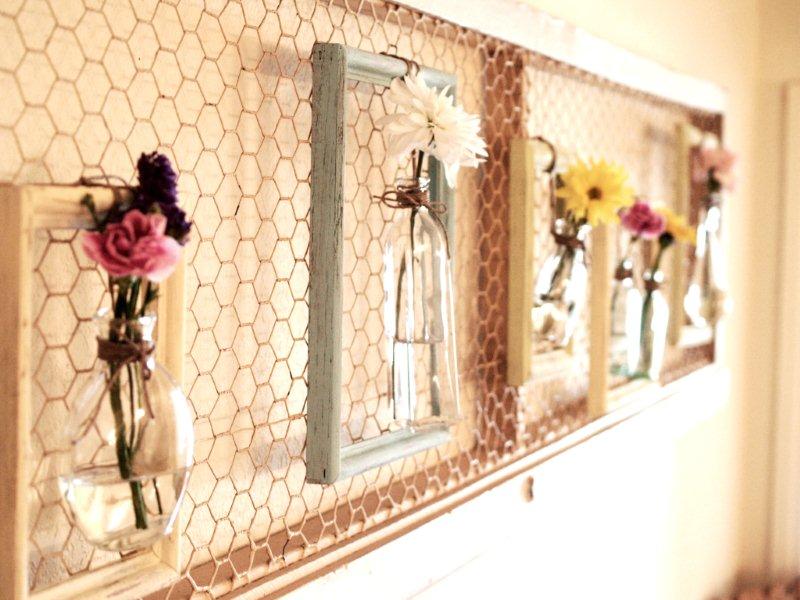
Until now! In trying to come up with a place to display the little vases – I realized that I had lots of space – on the wall of my dining room!
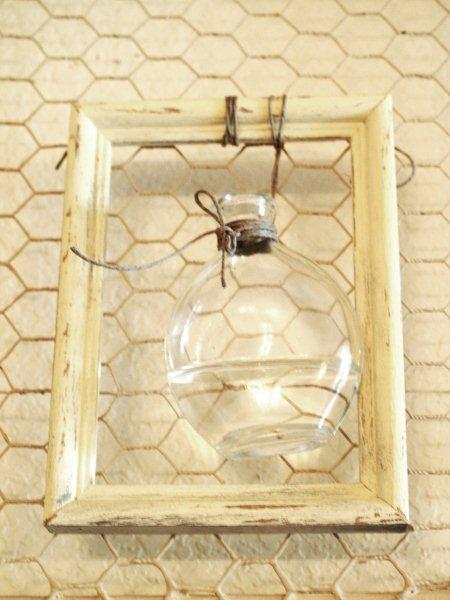
I have had a huge chicken wire screen door hung on the wall of my dining room for years. I change out the display on it often, cause I’m fickle like that. ;)
I have had a huge chicken wire screen door hung on the wall of my dining room for years. I change out the display on it often, cause I’m fickle like that. ;)
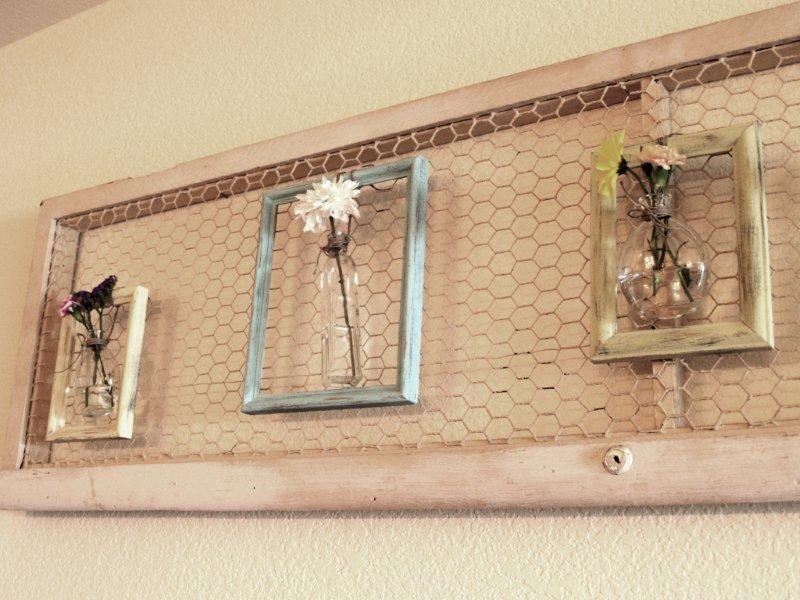
It seemed perfect for my little vase display and I love it!
Isn’t it bright and cheery? These flowers are pretty special to me too. They were part of two big bunches waiting here for me when I arrived home from Creative Estates last weekend.
And not only were there 2 big bunches – but they were still in the paper, because Mr. F.T. knows how much I love to arrange them.
Is that the sweetest or what??
And not only were there 2 big bunches – but they were still in the paper, because Mr. F.T. knows how much I love to arrange them.
Is that the sweetest or what??
So let’s get started. This is seriously super easy.
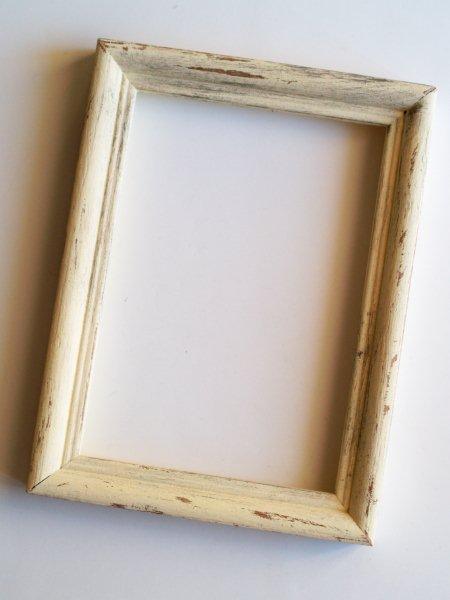
You’ll need frames, vases (one or two per frame), and twine.
If you are going to redo your frames, then you’ll need some paint too. ;)
If you are going to redo your frames, then you’ll need some paint too. ;)

If you have frames that you are happy with – you can skip this step.
I have a stash of ucky old oak frames – some of them were happy to donate themselves for a makeover. :)
I have a stash of ucky old oak frames – some of them were happy to donate themselves for a makeover. :)
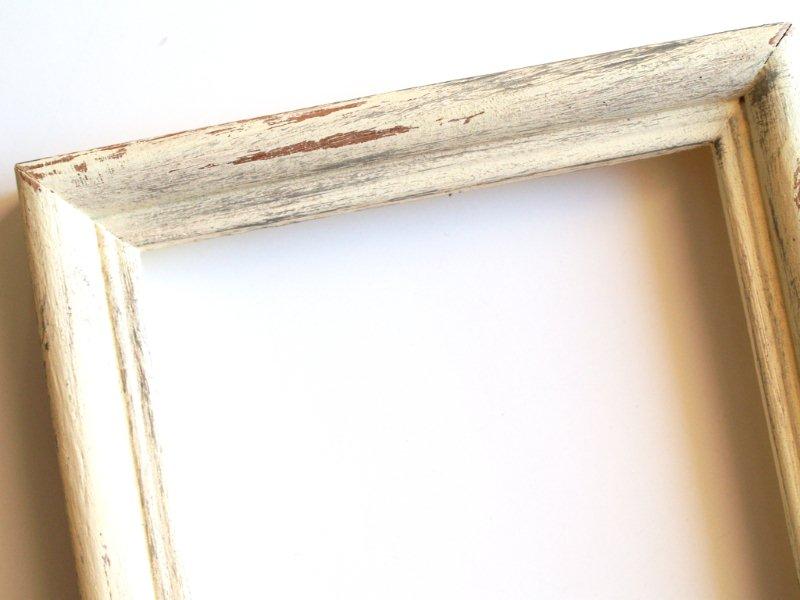
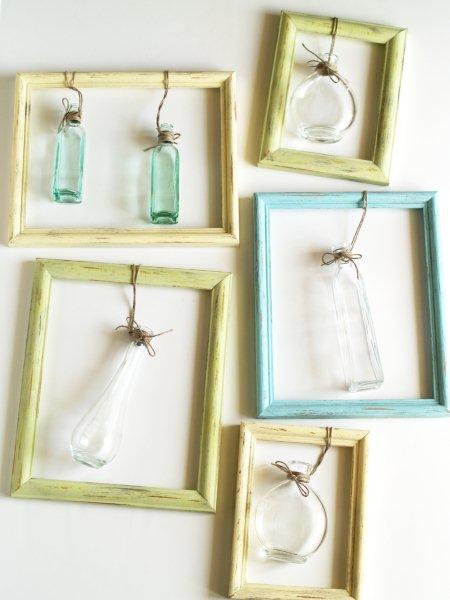
Start by painting your frames in the colors you’d like. I went for Spring-y colors – a blue, mossy green and a pale yellow.
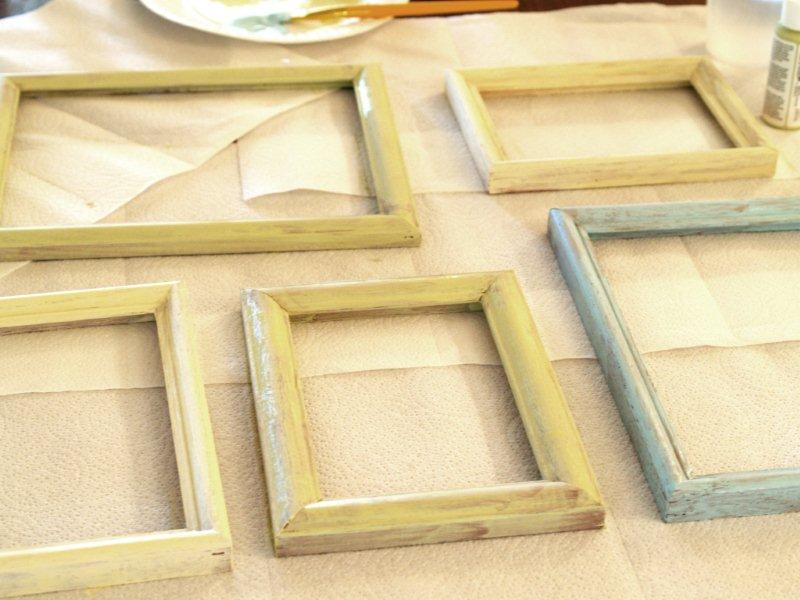
Make sure your frames are covered well – and that you paint the inside section where the glass goes as well. Since they’ll be open, this part could be visible from some angles when you hang it.
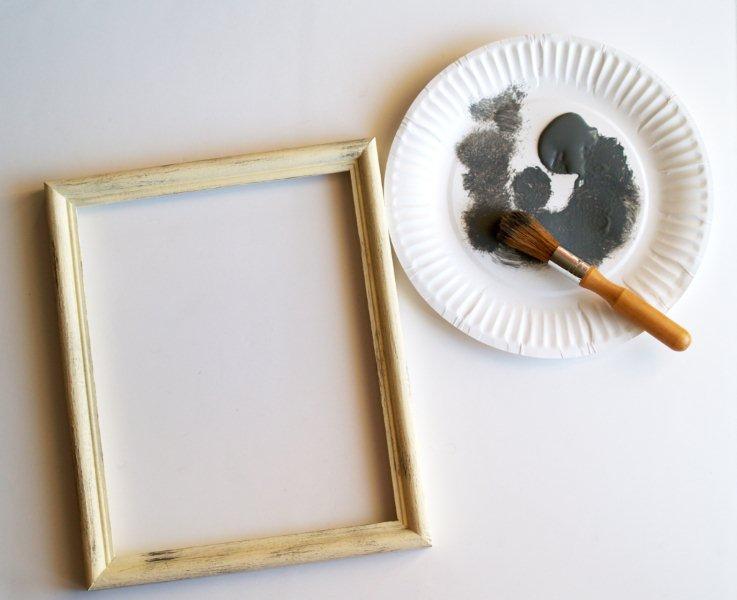
Once your frames are dry, brush on a contrasting color - I used dark gray.
Get the brush wet, then circle it on a paper plate to get almost all the paint off. Brush the paint lightly over the frame to add some contrasting color. This will age the frame a bit.
Get the brush wet, then circle it on a paper plate to get almost all the paint off. Brush the paint lightly over the frame to add some contrasting color. This will age the frame a bit.
Once the paint is completely dry – sand off some of the paint you just put on. We’re going for intentionally rustic here. ;)
Don’t sand all in one direction – it won’t look natural. Sand some in one direction, then switch and do a little more the other direction.
Don’t sand all in one direction – it won’t look natural. Sand some in one direction, then switch and do a little more the other direction.
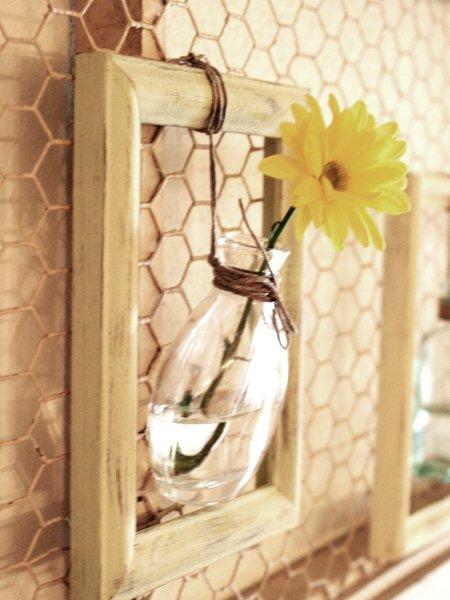
Once your frames are all ready and dry, cut your twine for the vases. I used about 40″ of twine per vase.
I didn’t want the twine glued on because I want to be able to wash the vases. But I wanted it to be sturdy so were going to do some wrapping and knotting here.
I didn’t want the twine glued on because I want to be able to wash the vases. But I wanted it to be sturdy so were going to do some wrapping and knotting here.
Loop the twine around the top of the frame and bring the ends up through the loop.
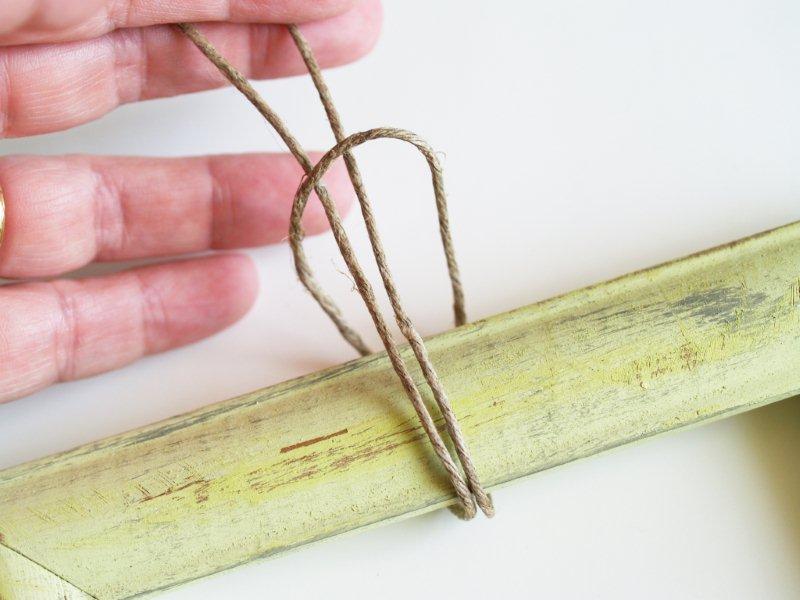
Pull this tight so that the doubled ends hang down into the frame.
Place the vase in the frame about where you want it to hang and measure where the twine hits the neck.
Place the vase in the frame about where you want it to hang and measure where the twine hits the neck.
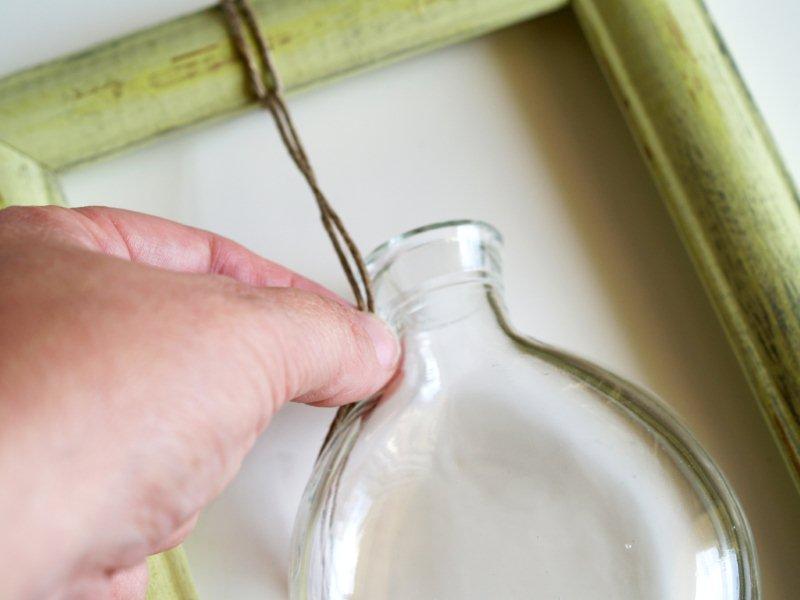
Make a knot in the twine right at the neck.

Align the knot with the back of the vase and begin wrapping the two ends of twine opposite directions around the neck of the vase.
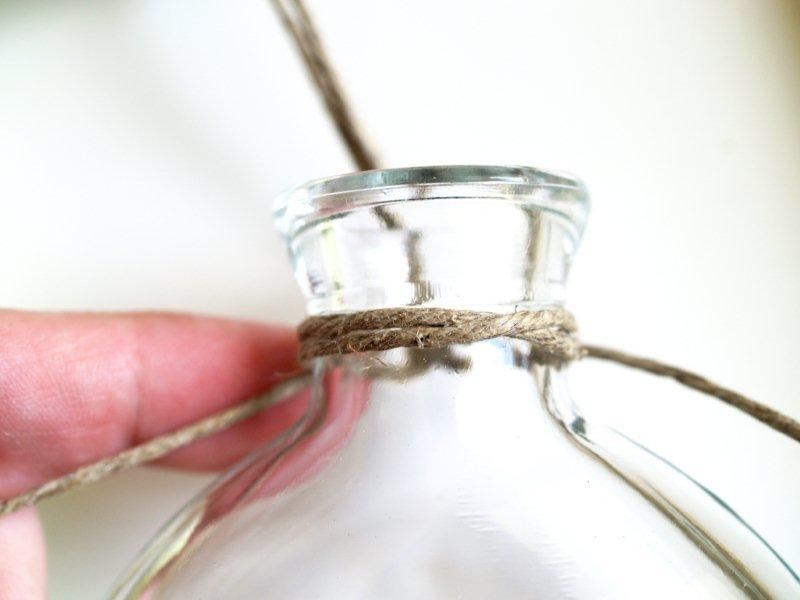
Continue wrapping until there about 3 or 4 inches on each end. Tie the remainder in a bow on the front of the vase.

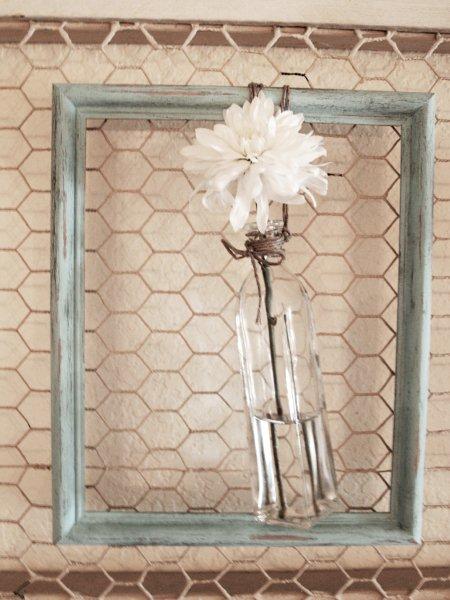
Now you have a pretty vase tied in your frame!
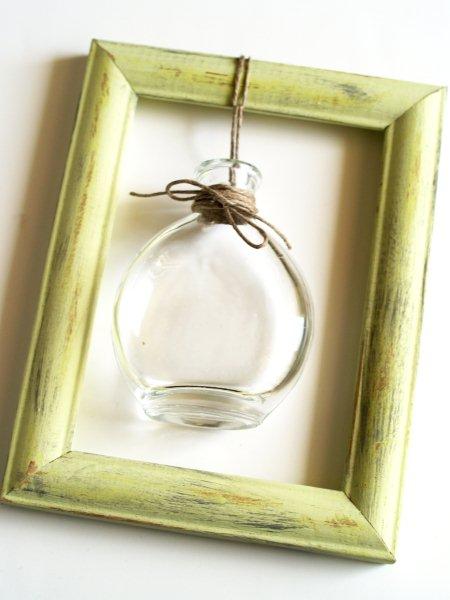
Continue with all your other frames.
And that’s pretty much it! See? So simple!!
Hang up your frames on the wall. You can rest them on nails (if you leave the nails showing it adds to the rustic look).
I tied mine to the chicken wire with more twine.
I tied mine to the chicken wire with more twine.
Add water to the vases. If you are using tiny bottles like these, you’ll probably need a funnel.
Add your flowers to the vases – and you’re all ready for spring!
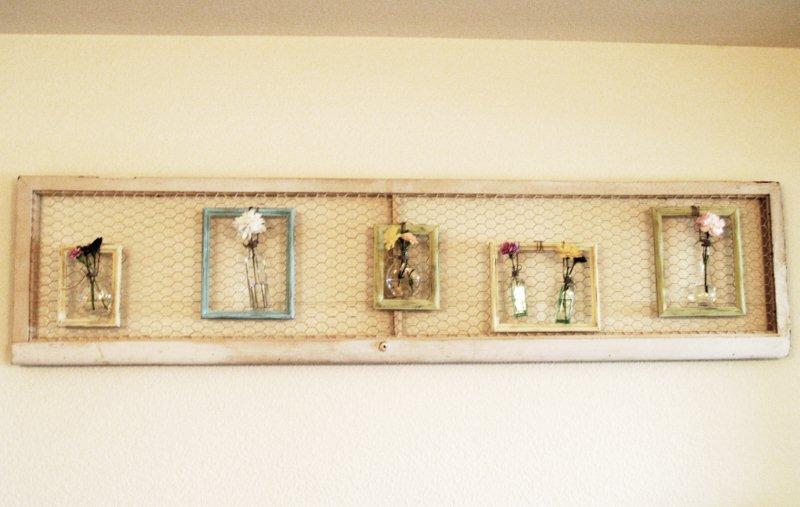
This would work so great as a wall grouping or a mantel display – there are so many options!
What do you think??
I’m linking to Today’s Creative Blog, Met Monday, Skip to my Lou, Tutorials & Tips Tuesday,
and the other fabulous parties on the sidebar – make sure you check them out!
and the other fabulous parties on the sidebar – make sure you check them out!
Abonner på:
Innlegg (Atom)